Slate is an excellent material for your roof tiles. When maintained, it can not only protect your roof but look great at the same time.
So, Learning how to lay slate roof tiles is an important skill when repairing or replacing a slate roof; and, if done correctly, will save you time and money on your roof maintenance. Please read our following guide to learn everything you need to know about laying slate roof tiles. Laying a slate roof can seem like a daunting job, but with careful patience and suitable materials, it can be done efficiently and to a high standard. There are three main steps to follow:
- Laying your underlay
- Fixing the Battens
- Settings out your slates
Safety procedures
When conducting any roof maintenance, you should always be aware of correct safety procedures. Performing home maintenance without regard for proper safety is a dangerous idea that could lead to personal injury or at least cause more damage to your home.
When working with Roof Slates, you should take time to put protections in place. Scaffolding is the best access method, but keeping the ladder fixed firmly to the side of the house will do if you’re only repairing a small section of your roof. An additional hook ladder would be helpful, but this will be explained later. Having a volunteer spot the bottom of the ladder while you work is essential.
Find some adequate clothing and footwear. Rubber-soled shoes and thick gloves are a good start. In addition, wearing a hard hat and a coat with thick sleeves will give you the best protection in case of any accidents. Purchasing some plastic goggles will also give you excellent eye protection when working with slate.
Slate tiles are incredibly durable but are dangerous to walk across. The slope angle on most roofs means you could easily slip and fall, so you should take care when walking across them. Older slate roofs can be particularly concerning as they may be more fragile.
Having a hook ladder comes in handy here—this type of ladder hooks over the Ridge tiles at the peak of the roof. The hook ladder allows you to distribute your weight between the ladder and the roof. It is essential that you gradually distribute your weight evenly when walking on a roof.

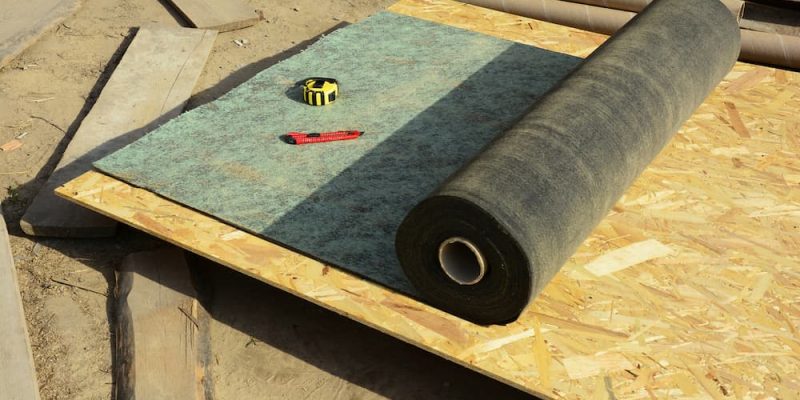
The Roof Underlay
The roof underlay is sometimes referred to as membrane or underlayment. Regardless of the name, they all do the same thing. Essentially your underlay will keep any moisture from penetrating the tiles and entering your building.
You should check the rafters for any old nails or debris that could damage the underlay before your roll it out. Once you are satisfied, you can begin laying your underlay. Start from one side and move across the roof, ensuring it’s flush against the verge. Nailing the start of your roll down will help keep the underlay in place as you move across the roof.
You can nail the underlay again along the middle, but this isn’t strictly necessary. Instead, nail the underlay again once you’ve reached the other side of the roof to secure it in place.
Fixing The Roof Battens
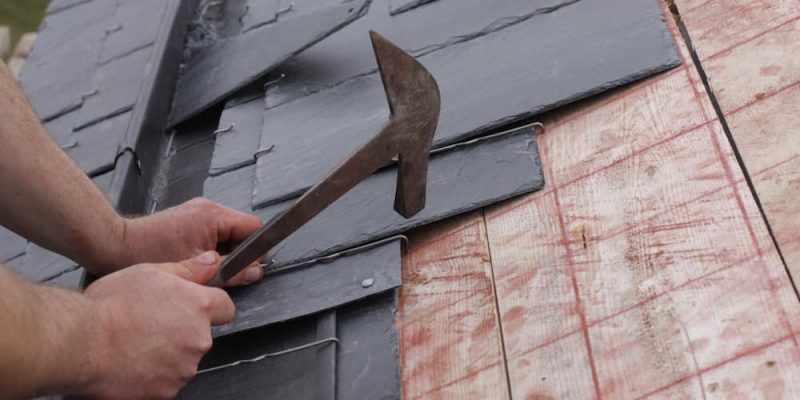
Now you have your underlay in place; you need to place your first battens. You will also need one under eaves slate tile and two full-sized stale tiles to proceed.
Place the battens on the roof but don’t fix them down yet. Then place one of the full-sized slate tiles on the batten and allow a 50mm overhang. Finally, fix the tile to the batten using temporary fixings.
The second batten will go beneath the slate tile near the first batten. Next, place the eaves slate tile into the second batten whilst making sure the eaves slate reaches the bottom edge of the roof.
A third batten is fitted below the top of the slates. Take the other full-sized slate tile and place it centred on the top of the third batten.
By fitting these initial three, you can now calculate your batten gauge. Then, measuring from the top of one batten to the top of the one next, you can figure out where the rest of the battens should go.
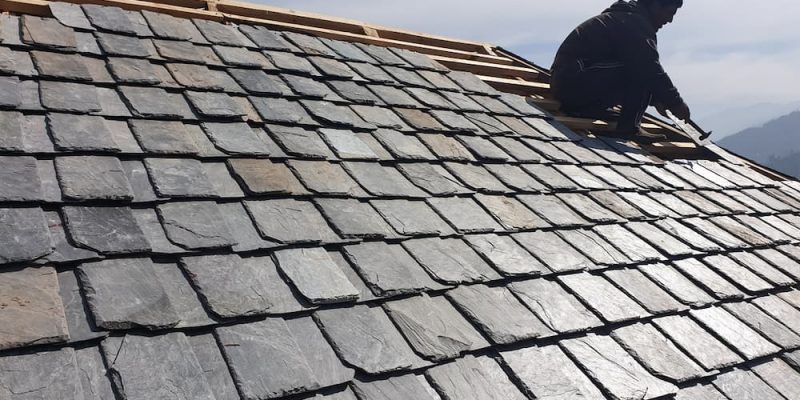
Setting Out And Laying Slate Tiles
To figure out how to set out your tiles correctly, we recommend drawing a chalk line from the ridge to the eaves at the width of every slate. Remember to allow a 5mm gap for the joint between each slate and the battens. This guide will ensure you don’t make incremental mistakes as you make your way across the roof.
It would be best if you lay your under eaves tiles first. Begin with a one-and-a-half slate to create a staggered pattern. Your first fill-length slate should be placed with its tail in line with the under eaves before nailing it in place.
Begin at the bottom and work upwards when placing your slates; bottom right to top left is recommended. This will help you avoid standing on slates as you place them and reduce any risk of slips or breaks.
Premium Slate Roofing Tiles
Slate roofs are popular for many reasons, offering a classic aesthetic alongside an impressively durable lifespan. In addition, they can look vintage while being brand new, an excellent choice for buildings in cities or natural landscapes.
At UK Slate, we specialise in offering a fantastic range of natural slate roofing tiles. In addition, we can import North American, Spanish slates, Vermont slates and Welsh roofing slate and many more. So please get in touch with our expert team to discuss how we can help you with your roof slate needs today.